About the Project
In this project we were given a sheet with a picture of a brake bracket with the dimensions used to draw it, and were told to replicate what was on the paper. Using Inventor I replicated what was on the paper. Then we had to use a new program called Fusion 360, and we used that to so the mill what to cut out and what to leave. It was a very difficult project, but in the end it was cool to see my work come to life.
Modeling
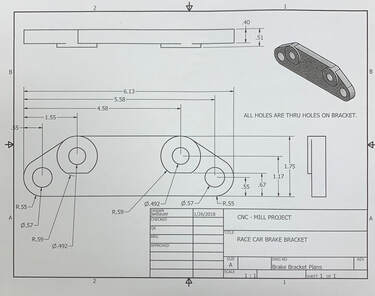
This is a photo of the piece of paper that I was given in order to replicate it on Inventor. Although I do not have any pictures of my brake bracket in inventor, this photo is exactly what I drew in Inventor. And the photo in the top right of the paper is the exact same way my brake bracket looks in Inventor.
Fusion 360
Mrs. Proctor taught us how to use Fusion 360, it is a program that let's you have the ability to create tool paths so that you can cut out things perfectly. In this case we used the mill to cut out a brake bracket. We used Fusion to create the tool paths so that we could cut out the brake bracket. This was the part that took the longest to do.
Setting Up The Mill
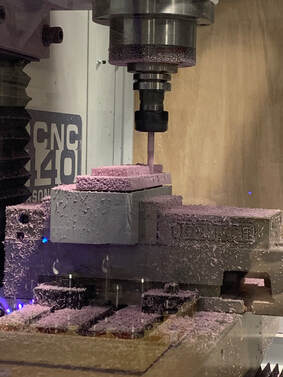
This is a photo of my brake bracket in the CNC Mill.
We used what we created in Fusion 360 to put into
the mill and it cuts it out exactly how we modeled.
It was cool to see my design becoming a reality.
We used what we created in Fusion 360 to put into
the mill and it cuts it out exactly how we modeled.
It was cool to see my design becoming a reality.
Final Product
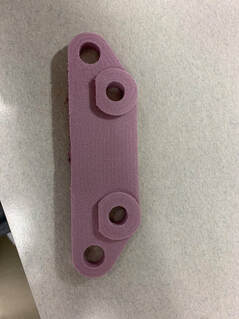
This is a photo of my final product. It
took a long tie to make but as always
it's really cool to see your designs come
to life.
took a long tie to make but as always
it's really cool to see your designs come
to life.
What I Learned
During this project I learned how to use Fusion 360. I also learned how to use the CNC Mill. And when you use both of them together, you can create things on a computer and replicate them to perfection in 3D using real life materials. And that in my opinion is really cool.
